¶ Introduction
In 3decision, you have various ways to persist things you are doing in the platform and share it with others. One of these ways is through the use of projects.
¶ Project in 3decision
A project in 3decision allows you to accomplish the following tasks:
- Isolate and share stuctures only with a subset of users
- Keep an organized list of structures of interest for a project
- Define a reference structure and viewpoint to standardize views
In its simplest form, a project is a list of structures of interest a user can share with other users.
¶ Project Creation
In 3decision, projects can be created from different places.
The central place to create a new project is the project list that you can access via the project icon in the navigation bar.
![]()
Here, you can simply create a project by clicking on the top right button New Project. A popup will appear, asking you to enter the name of a project and a short description.
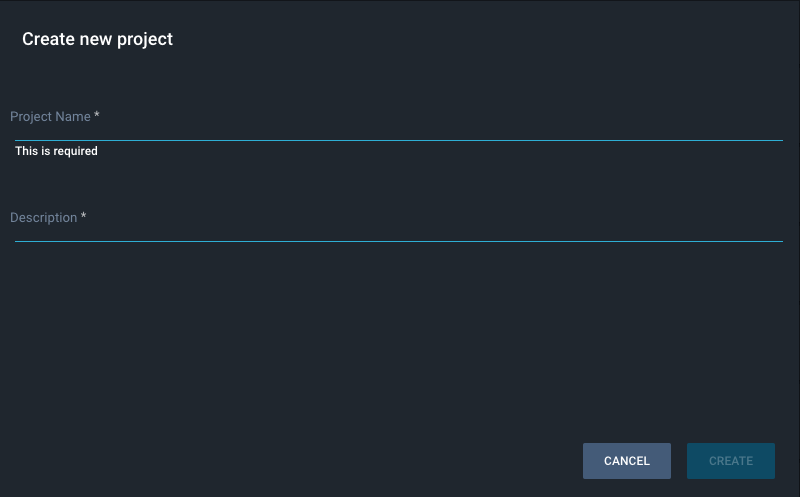
Note: if you already created a project with the same name, 3decision will ask you to change the name.
¶ From search results
If you want to add a list of structures you just found through a search in 3decision, you can create a project directly from the search results window.

You can click on the ADD TO PROJECT button in the list. This will open you the next dialog where you can enter the project name you want to create.

3decision will try to find the project, if it doesn't exist yet, you have to option to create it on the fly by clicking on the project name (create new project) in the suggested items.

Next, you will see a form allowing you to define the description of the project.
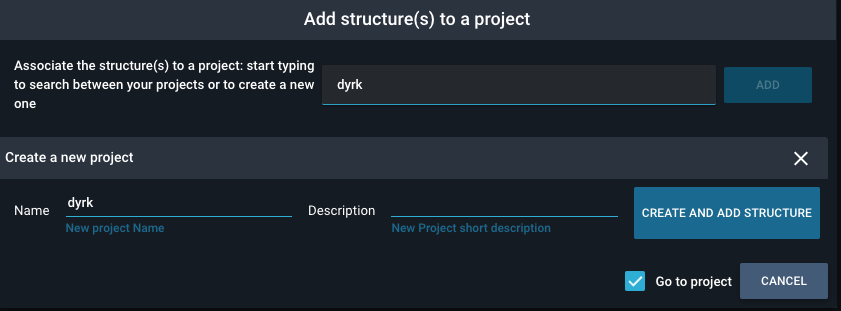
Click on the CREATE AND ADD STRUCTURE button to finalize the process.
¶ In the workspace
While working with a set of structures opened in the Workspace, you can decide to add either all structures or some of them into a project, or create a project on the fly.
To do that, click on the three dots icon for a collection of structures.
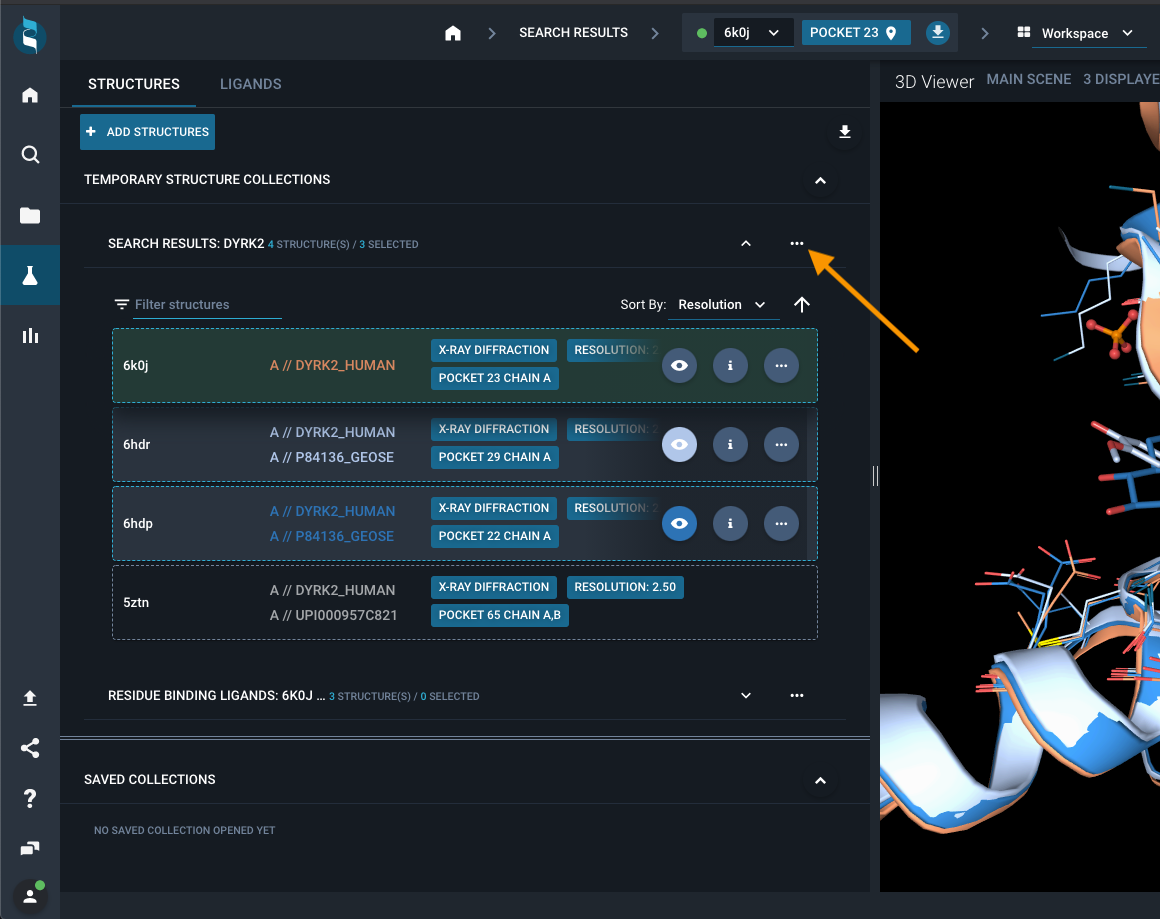
Next, choose to add either all structures or only the selected ones into a project.
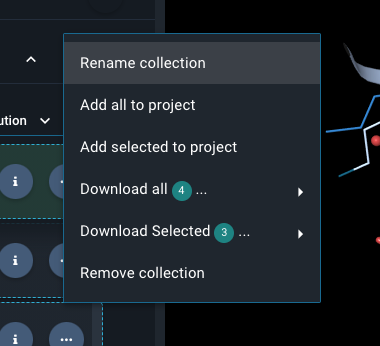
Now, you can specify the name of the project. If the project does not exist yet, you will be able to generate it on the fly as described in the paragraph on project creation from search results.

¶ Set a reference
Once a project is created, you can define a reference structure allowing all structures in the project to be aligned on the reference pocket. This setting needs three different steps:
-
Click on the structure you intend as a reference to select it. Then click on the set project reference with the star symbol to define it.

-
The Settings window will open for defining more details. Set a reference pocket by clicking on the ligand (grey circle) and press select pocket to proceed.
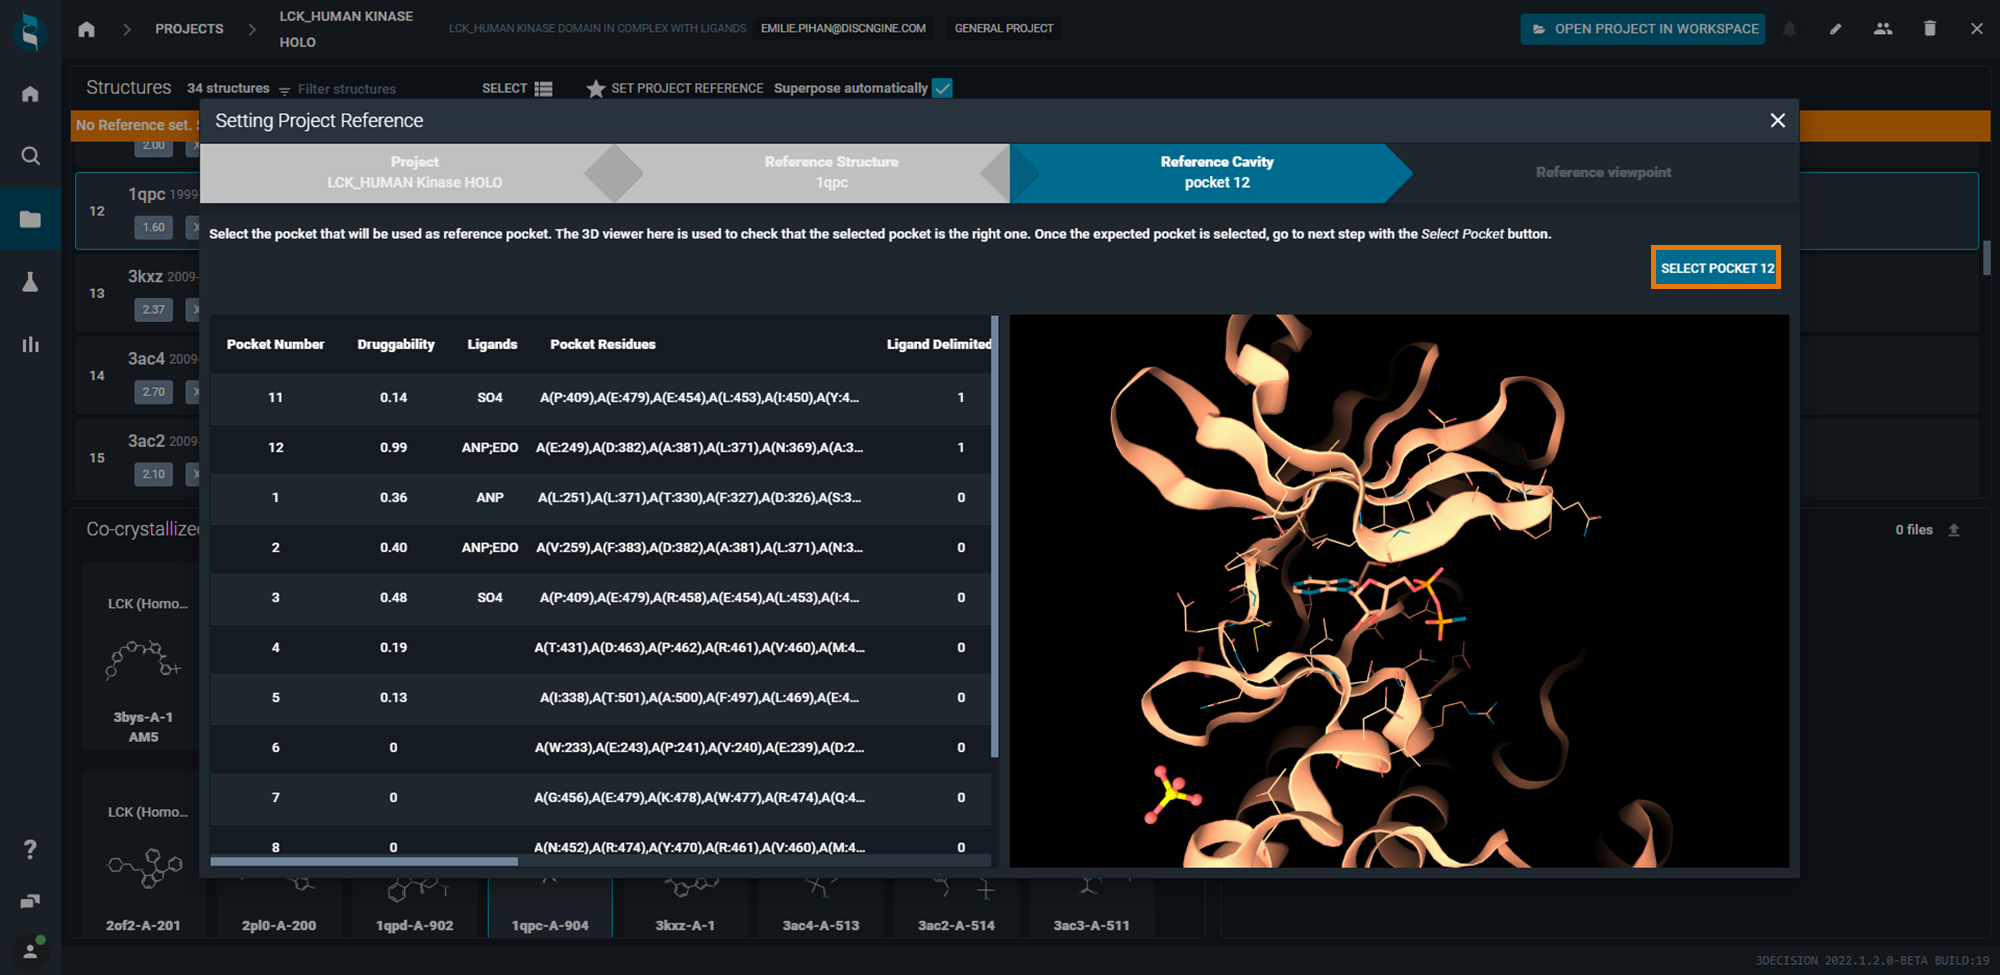
-
The last step is to define a reference viewpoint - everytime you open a project, 3D viewer will automatically present this view. Zoom and rotate to define it, then click OK button.
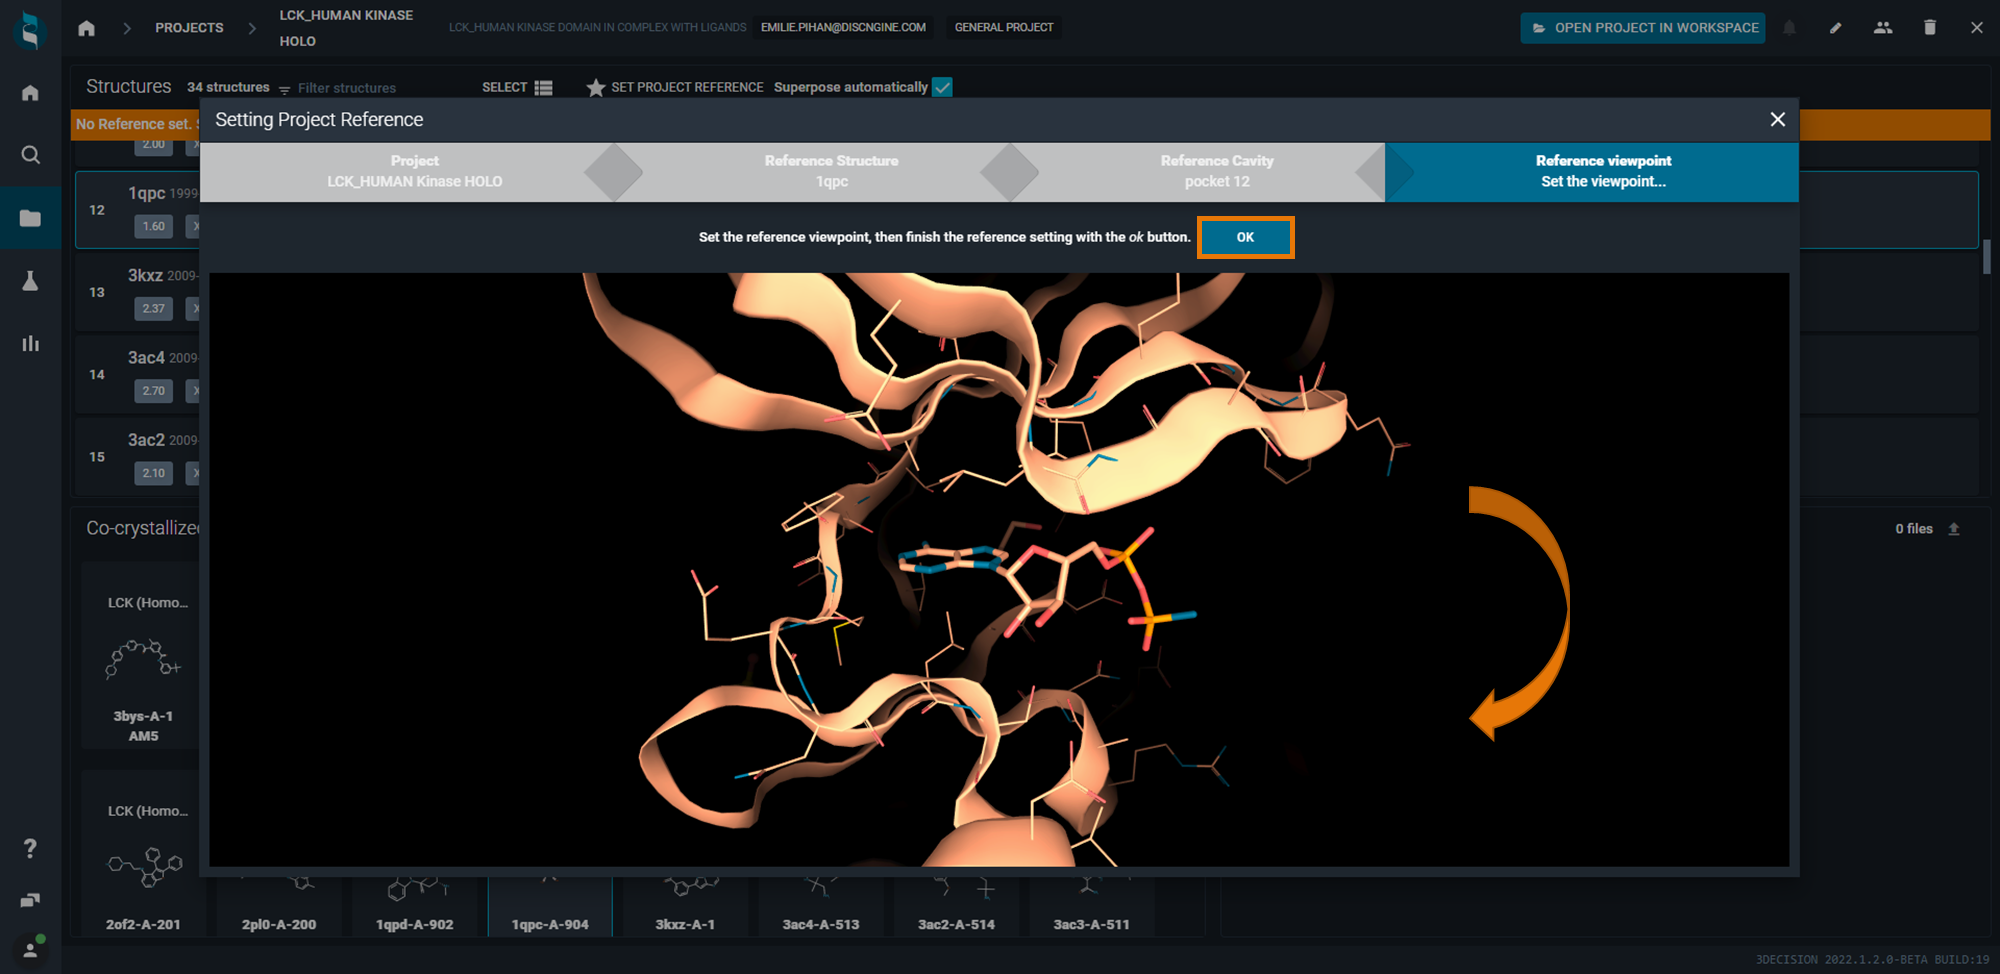
The green color indicated successful set of a reference. Et voilà! - The project is now completely set up and you can open in the Workspace and start your work.
¶ Default 3decision Projects
By default, 3decision contains pre-defined projects that are described in this section.
3decision creates and is the owner of two projects:
-
PUBLIC: contains all structures from the public domain (RCSB PDB; AlphaFoldDB). All the newly deposited public structures are automatically added to this project.
-
COMMUNITY: all the structures contained in this project are accessible to all users. When 3decision is delivered, this project is empty, but it should be exploited for in-house structures, to make them easily available to all users.
Note that these two projects are NOT visible in the project list page.
Also, by default 3decision creates a Project that is owned by you (each user has a personal one), and is accessible from the project list page:
- [your username]: contains all structures that you have registered in 3decision on your own.
